Too much Photoshop-style pixel editing of color and tone, as well as oversharpening, can easily degrade image quality. Keep an image file in 16-bit mode if planning major adjustments, since the greater bit depth allows wider adjustments without loss of detail, posterization or banding.
Editing in a raw converter or in 16-bit mode helps avoid some of the problems associated with aggressive adjustments. Editing images encoded with a greater bit depth than standard 8-bit images offers more intermediate "slots" where the pixel values can move, eliminating many gaps and spikes in the histogram of the finished image.

Result of excessive tone adjustments in an 8-bit file; the comb-like gaps in the graph indicate unused tonal values. Shading gradations that should be imperceptibly smooth will become noticeable, often called "banding."
scanning
Use high-quality scanners for film originals. But note the quality of the scan depends as much on operator skill as on the technology employed. Inexpensive flatbed scanners designed for reflective art and documents are not recommended for film. Scans should be viewed at 100 percent on screen to detect dust, hairs, fingerprints and any other problems. Make and store the scans in a wide-gamut color space. Ideally, profile the scanner with a test target and profiling software. Delivered images should be free of sensor dust spots, scan lines, digital aberrations, artifacts, banding, excessive grain, moiré, chromatic aberrations and excessive noise.
bad processing examples
Michelle Alvarado, photography director at Panoramic Images, has provided the following illustrations of common digital image quality problems. Some of these examples are from film scans, others from digital capture.
Blocked color. Image shows blocked black and bluish color areas. Also, the shadows on the hippo skin appear to be blue in some areas, suggesting a chromatic aberration.
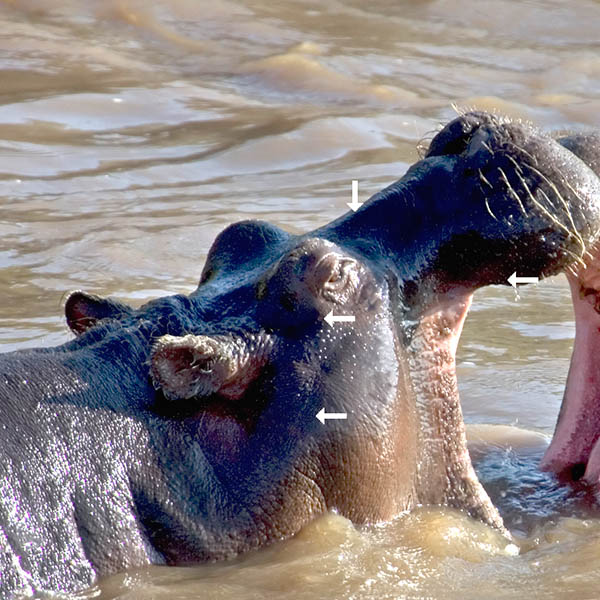
Photo © Panoramic Images
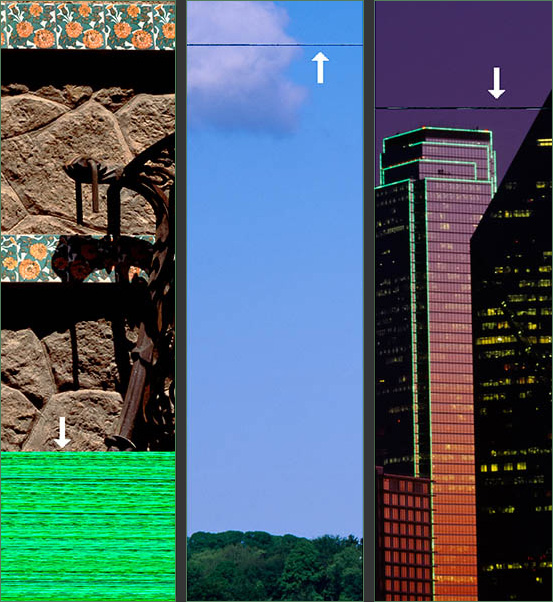
File corruption. Three examples show some different types of visual file corruption. Note the heavy green lines at the bottom of the left image. The middle image has a line that changes position each time this file is opened. The right image has a fixed line that could be mistaken for a power line in this skyline image.
Photos © Panoramic Images
Dirty scan or sensor. This needs spotting to remove specks of dirt, dust and hairs. A dirty digital camera sensor can create a similar effect. If your camera exhibits evidence of dust on the sensor, clean the sensor.
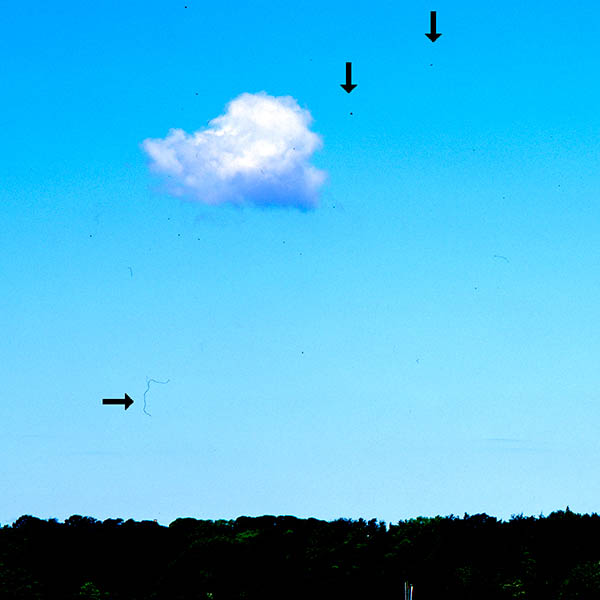
Photo © Panoramic Images
Oversharpened grain. Example of a scanned image with more than usual grain. It also appears oversharpened. If an image is grainy (or a digital image is noisy), avoid oversharpening. There are Photoshop techniques (adding blur) and plug-ins, as well as stand-alone programs, designed to reduce noise and grain.
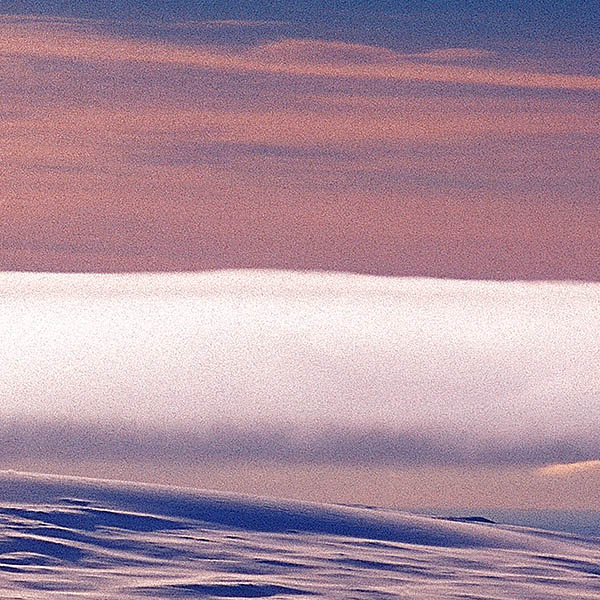
Photo © Panoramic Images
Moiré . This striped shirt has a moiré pattern. Moiré can result from interference between the sensor grid, and a grid occurring in the original scene. Moving closer or farther away, or tilting the camera slightly, may alleviate moiré at the time of capture. Many cameras have anti-aliasing filters in front to their sensors to counteract moiré, but some do not. If you notice moiré in a captured image, some raw processing software and Photoshop plug-ins can remove or reduce it.
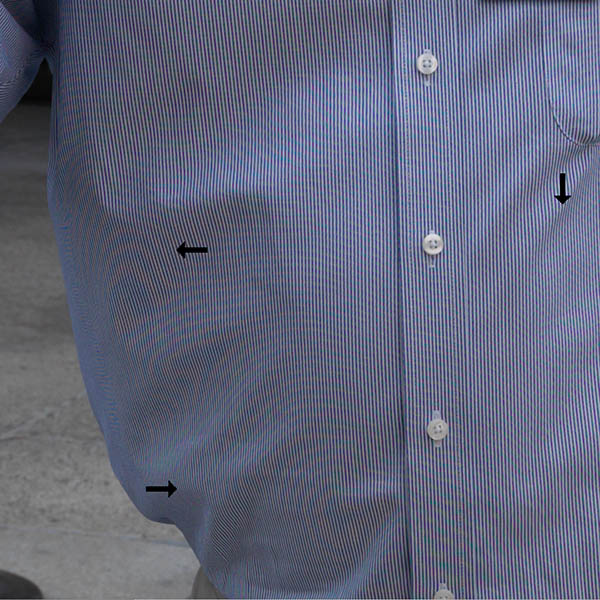
Photo © Panoramic Images
Noise and scan lines. Green scan lines, along with green and red noise, appear in the shadow areas. Digital cameras set at high ISO sensitivities often generate luminance or color noise. If high ISO settings are unavoidable, you can reduce this noise with controls in raw processing software, with Photoshop filters and plug-ins, or with standalone programs.
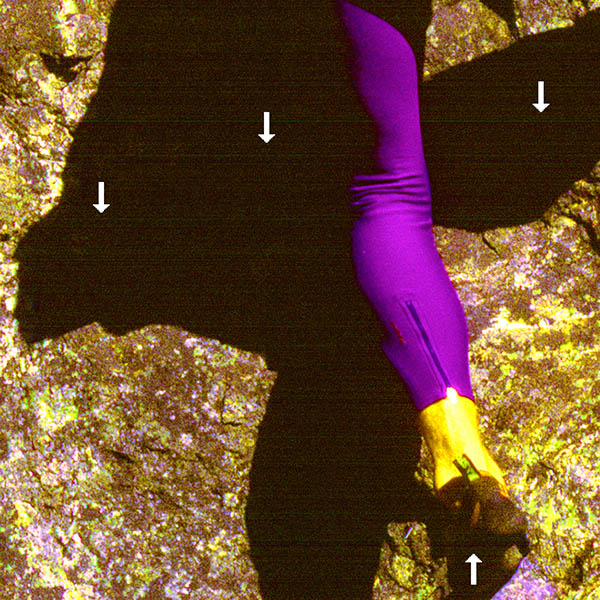
Photo © Panoramic Images
Poor stitching technique. Two digital images are combined below, leaving visible stitch lines and repeated picture elements. High-quality stitching software and careful technique can help reduce this. Carefully evaluate stitched images at 100 percent or larger on your monitor.
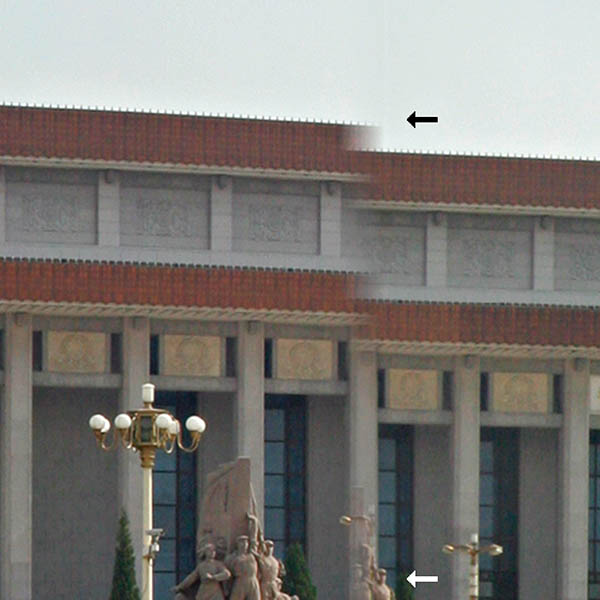
Photo © Panoramic Images
limiting output levels for print
We have recommended in the past that digital images prepared for commercial printing should have output levels set between 3 and 253 (RGB mode).
The restriction of levels to between 3 and 253 is a) unnecessary — http://photoshopnews.com/2008/01/14/camera-raw-and-the-shadow-output-levels/ and b) a reflection of incorrect handling of shadows and highlights. (For example: lifting shadow detail will do more for the image.) The amount of tone restriction depends on the output and should properly be done close to print output. The printer may pull the range in much further. Many publishers will repurpose images for web use the future. It is a mistake to handle all images as if they were being output to print.